Core Data Lightweight Migration
March 23, 2014
This is a short guide to help you update and migrate your Core Data model. As we all know your app will evolve over time and so will it’s data model. If the changes are small there is a chance that updating your app will be rather painless and without the need to provide custom mappings. Apple provides you with “automatic” migration of your model, which is referred to as Lightweight Migration.
Lightweight migration can be used when the changes to the model are simple. In that case Core Data will be able to infer the mappings between your old and new data model. Some of the changes covered are:
- adding/removing of the attribute
- renaming entity or property
- setting default value
There are simple steps that you as a developer have to take to request lightweight migration. Let’s go through them.
Create new data model
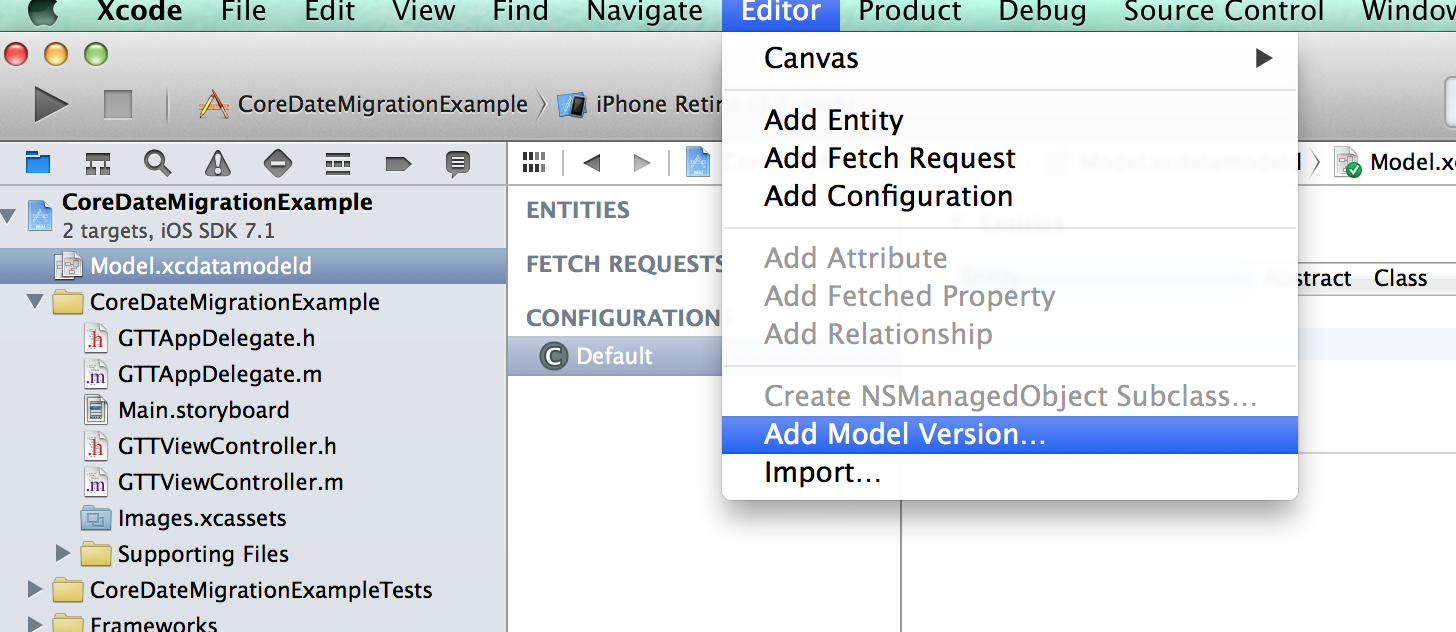
First of all you need to create new version of the data model before you can use it. In order to do it select your current data model (file ending in .xdatamodeld) and then navigate to Editor > Add Model Version…
XCode will prompt you for the name of the model. Remember to name it in an appropriate manner i.e. include version number in the name. The model should now be split into two, the old and the new. It should look similar to this
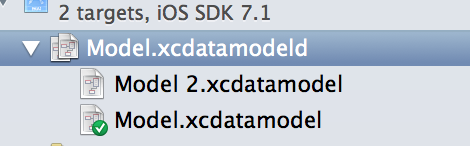
The green tick marks the model that is currently used by the app. As we haven’t yet changed it it should mark the old version. We will address that in the next step
Use new data model
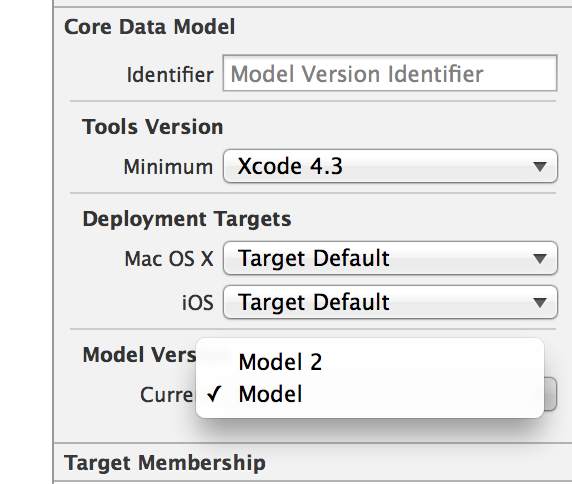
With Model.xcdatamodeld selected go to the File Inspector. Find Model Version option which will show you the list of available data models. Select the one you want to use.
Enable automatic persistent store migration
One of the last steps that you need to take is to enable the lightweight migration. This is very simple task. All you need to do is pass the following options when adding new persistent store:
    NSDictionary *options = @{
          NSMigratePersistentStoresAutomaticallyOption : @YES,
          NSInferMappingModelAutomaticallyOption : @YES
    };
And then when adding the persistent store:
[_persistentStoreCoordinator addPersistentStoreWithType:NSSQLiteStoreType configuration:nil URL:storeURL options:options error:&error]That’s it. Now next time you run your app Core Data will try to automatically migrate your data model if it can.
Update subclasses of NSModelObject
If you have any subclasses of NSModelObject generated for entities from your old model which were updated you will have to add the new properties to them. You could also delete and generate the classes again. It’s up to you.
That’s all there is to enabling lightweight migration. You can find more info on this and more complex migrations in Apple’s documentation in here: https://developer.apple.com/library/ios/documentation/Cocoa/Conceptual/CoreDataVersioning/Articles/Introduction.html